20230115-Manjaro 與 VSCode 綜合練習
Manjaro
安裝 Manjaro (VMWare)
- 至官網下載 manjaro-kde-22.0-221224-linux61.iso
- 建立新 VM
- 需先 enable Shared Folders 並指定好對應本機路徑
初始設定 Manjaro
- 日期和時間->勾選「自動設定日期與時刻」
- 編輯 /etc/fstab 後其中加上一行文字如下,才可開啟本機 Shared Folders
- 參考文章 VMware shared folder not showing in /mnt/ on Ubuntu guest
1
vmhgfs-fuse /mnt/hgfs fuse defaults,allow_other 0 0
- 順便調整 Kate 設定: 檢視->文字折行->取消勾選「動態折行」
- VM 關機,取消掛載 ISO 再重新開機 (整個 VM 畫面放到最大)
- 取消顯示開機歡迎畫面
- 將所有套件更新
- 確認 /mnt/hgfs/ 已可看到本機資料夾
摘要備忘文字
1 | enable Shared Folders |
VS Code
安裝 .Net Core
1 | sudo pacman -S dotnet-sdk |
- 使用官網教學的 snap 可能會導致 Segmentation fault (core dumped)
- 參考文章 How to fix “Segmentation fault (core dumped)” when creating new dotnet project?
安裝 VS Code
- 開始->設定->加入或移除軟體->左上角搜尋icon->找到 Code-OSS(Code)->按向下箭頭的icon->套用->相依套件一併確認下載
- 手動開啟 VS Code -> 初始設定選擇資料夾 -> 進到終端機輸入指令另外開啟 VS Code (超級使用者)-> 初始設定選擇資料夾
1
sudo code --no-sandbox
編寫練習
- 建立新專案
1
sudo dotnet new console --framework net7.0
- 安裝組態相關的 Nuget 套件
1
2
3
4dotnet add package Microsoft.Extensions.Configuration
dotnet add package Microsoft.Extensions.Configuration.Json
dotnet add package Microsoft.Extensions.Configuration.EnvironmentVariables
dotnet add package Microsoft.Extensions.Configuration.Binder - 參考文章
在 .NET Core 主控台應用程式中使用 appsettings.json 設定檔
Microsoft.Extensions.Hosting
偵錯
- 執行->偵錯->下載套件、json設定
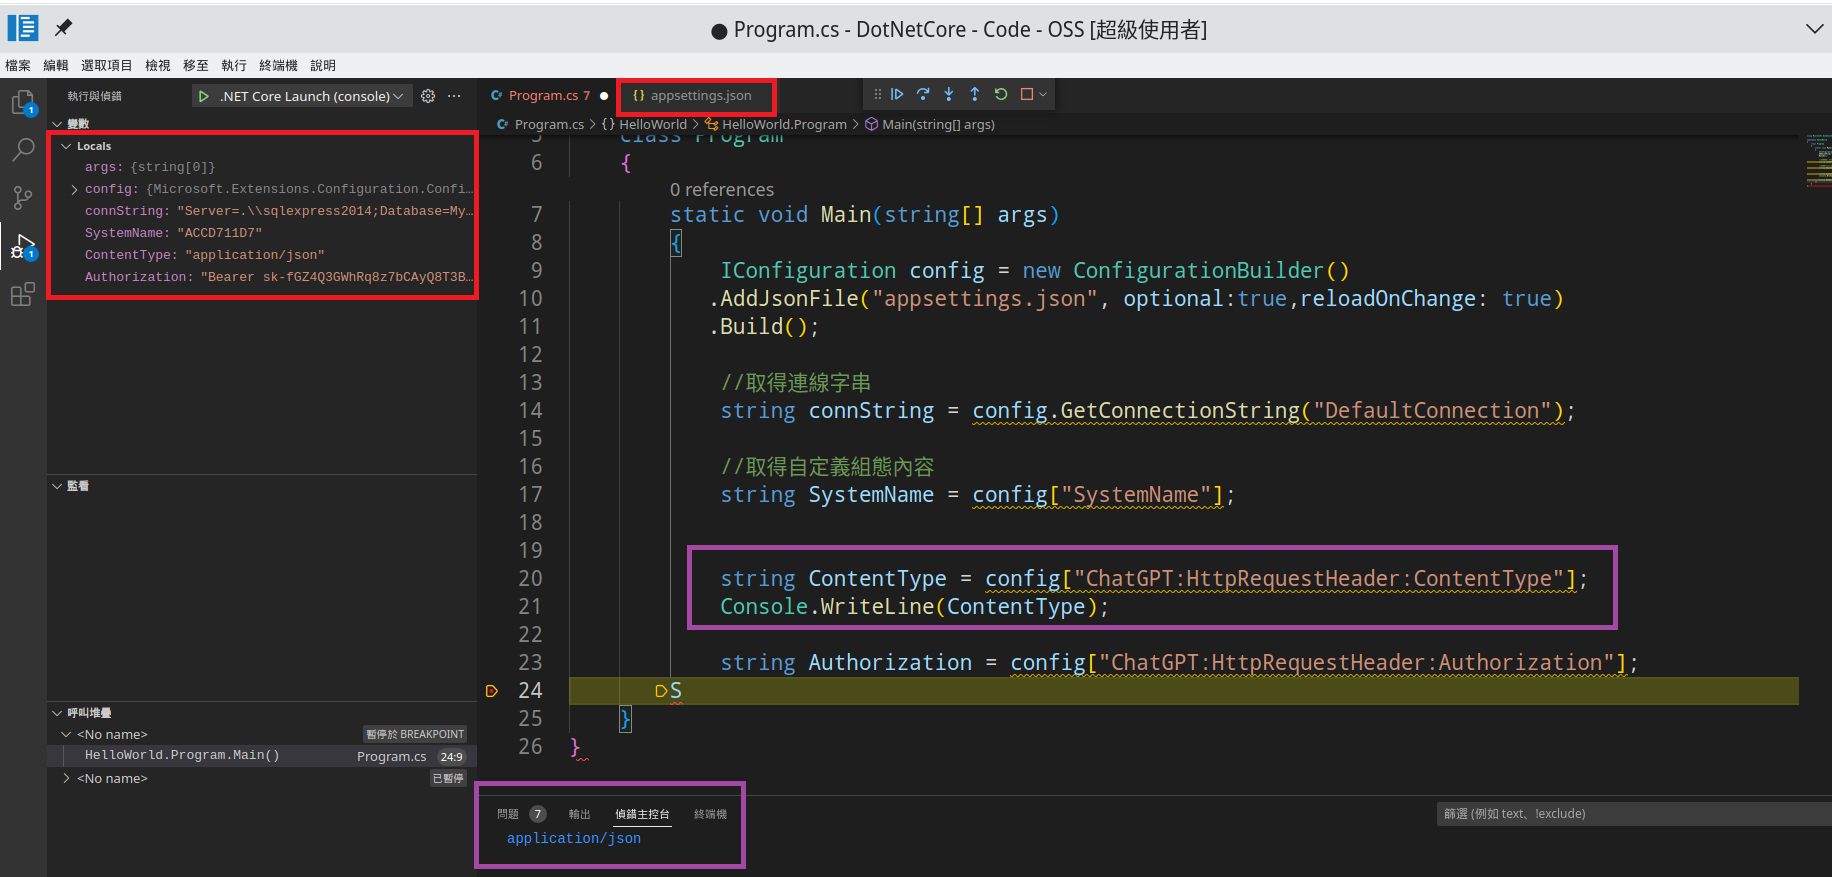
成果
取設定值的程式範例
1
2
3
4
5
6
7
8
9
10
11
12
13
14
15
16
17
18
19
20
21
22
23
24
25
26using Microsoft.Extensions.Configuration;
namespace HelloWorld
{
class Program
{
static void Main(string[] args)
{
IConfiguration config = new ConfigurationBuilder()
.AddJsonFile("appsettings.json", optional:true,reloadOnChange: true)
.Build();
//取得連線字串
string connString = config.GetConnectionString("DefaultConnection");
//取得自定義組態內容
string SystemName = config["SystemName"];
string ContentType = config["ChatGPT:HttpRequestHeader:ContentType"];
Console.WriteLine(ContentType);
string Authorization = config["ChatGPT:HttpRequestHeader:Authorization"];
}
}
}設定檔內容範例
1
2
3
4
5
6
7
8
9
10
11
12
13
14
15{
"ConnectionStrings": {
"DefaultConnection": "Server=.\\sqlexpress2014;Database=MyDB;Trusted_Connection=True;MultipleActiveResultSets=true"
},
"SystemName": "ACCD711D7",
"ChatGPT": {
"Host": "https://api.openai.com/v1/completions",
"Year": 2023,
"HttpRequestHeader": {
"ContentType": "application/json",
"Authorization": "Bearer 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"
},
"Encoding": "utf-8"
}
}設定檔位置範例
1
/home/hcc/DotNetCore/bin/Debug/net7.0/appsettings.json
預期的偵錯畫面
2023/01/17 更新
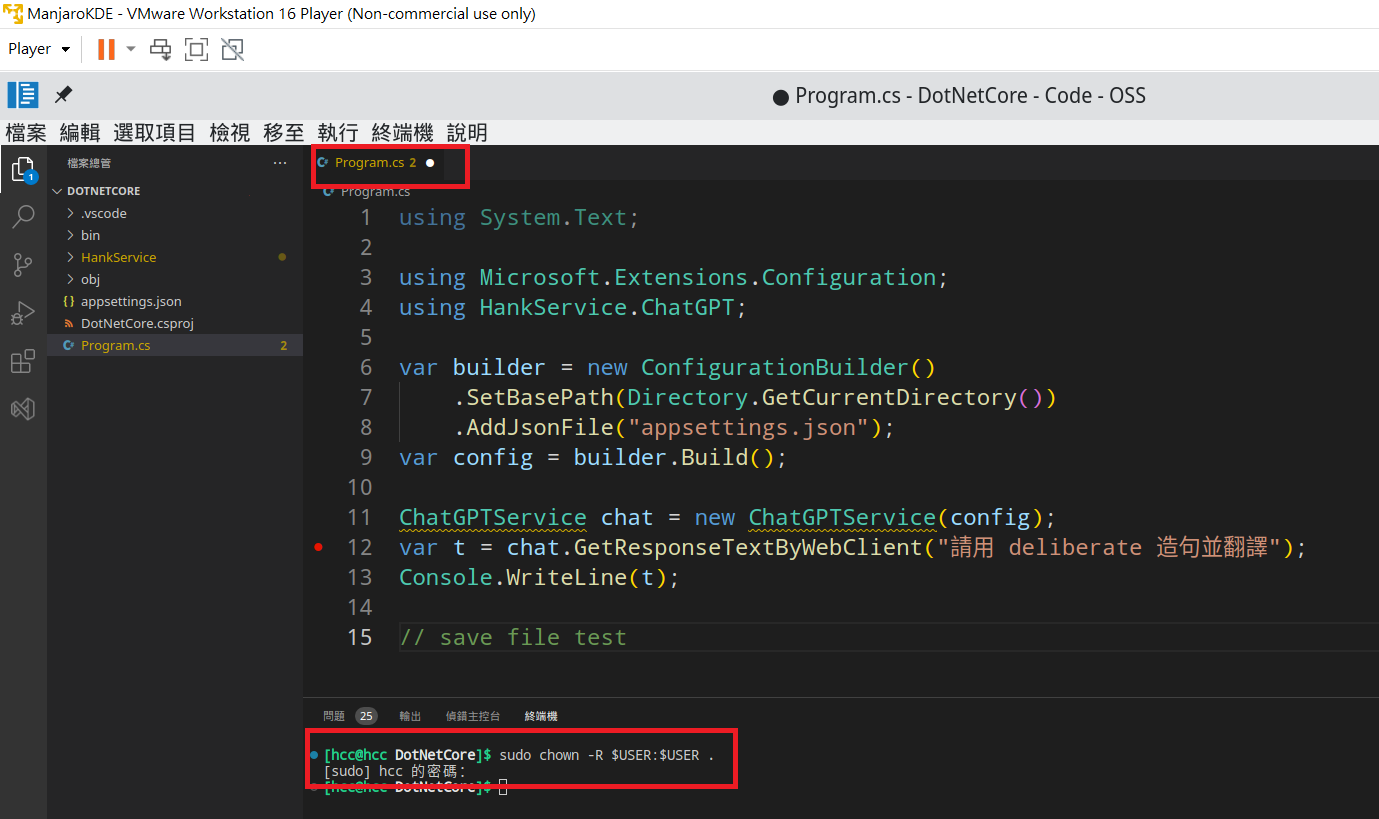
VS Code存檔權限
- 不是使用超級使用者打開 VS Code
- 改用下列步驟
- 先使用桌面/工具列捷徑打開 VS Code
- 開啟資料夾
- 存檔無權限時,移至 VS Code 的終端機
- 輸入以下指令
1
sudo chown -R $USER:$USER .
備忘
- 以 “linix vs code save file” 為關鍵字,搜尋到以下文章
- vscode always ask for permission to save